🇬🇧 English
🇬🇧 English
Appearance
🇬🇧 English
🇬🇧 English
Appearance
Armor provides the player with increased defense against attacks from mobs and other players.
INFO
If you plan to make multiple armor materials, consider using an Enum to store them. Vanilla does this in the ArmorMaterials class, which stores all the armor materials that are used in the game.
This class can also be used to determine your armor material's properties in relation to vanilla armor materials.
All armor items - like tools - have an armor material.
The armor material tells the game what protection and durability the armor item should have depending on the slot.
You'll need to create a class that inherits ArmorMaterial, like so:
public class GuiditeArmorMaterial implements ArmorMaterial {
	// ...
}The following methods will have to be implemented as well - these methods tell the game vital information on your armor items:
getDurability(ArmorItem.Type type) Returns the durability for a specific armor type - in hit points.
The hit points specify the amount of hits the armor item can take before breaking.
Example
@Override
public int getDurability(ArmorItem.Type type) {
	// Replace this multiplier by a constant value for the durability of the armor.
	// For reference, diamond uses 33 for all armor pieces, whilst leather uses 5.
	int DURABILITY_MULTIPLIER = 12;
	return switch (type) {
		case BOOTS -> 13 * DURABILITY_MULTIPLIER;
		case LEGGINGS -> 15 * DURABILITY_MULTIPLIER;
		case CHESTPLATE -> 16 * DURABILITY_MULTIPLIER;
		case HELMET -> 11 * DURABILITY_MULTIPLIER;
		default -> 0;
	};
}getProtection(ArmorItem.Type type) Returns the protection value for a specific armor type.
Usually this is always the same, regardless of your armor material.
Example
@Override
public int getProtection(ArmorItem.Type type) {
	// Protection values for all the slots.
	// For reference, diamond uses 3 for boots, 6 for leggings, 8 for chestplate, and 3 for helmet,
	// whilst leather uses 1, 2, 3 and 1 respectively.
	return switch (type) {
		case BOOTS, HELMET -> 3;
		case LEGGINGS -> 6;
		case CHESTPLATE -> 8;
		default -> 0;
	};
}getEnchantability() How easy is it to get better and higher level enchantments with this item?
Example
@Override
public int getEnchantability() {
	return 5;
}getEquipsound() What sound should be played when the armor is equipped?
Example
@Override
public SoundEvent getEquipSound() {
	// Example for Iron Armor
	return SoundEvents.ITEM_ARMOR_EQUIP_IRON;
}getRepairIngredient() What item or items can be used in an anvil to repair the armor items?
Example
@Override
public Ingredient getRepairIngredient() {
	return Ingredient.ofItems(ModItems.SUSPICIOUS_SUBSTANCE);
}getName() The name of the armor material - must be lowercase.
Example
@Override
public String getName() {
	return "guidite";
}getToughness() How much protection should be given for high-damage attacks?
For reference, everything except diamond (2.0F) and netherite (4.0F) have a toughness of zero.
Example
@Override
public float getToughness() {
	return 2.0F;
}getKnockbackResistance() How much knockback resistance should the armor give the entity?
Example
@Override
public float getKnockbackResistance() {
	// We don't want knockback resistance for guidite armor, but if you do,
	// change this value to 0.XF, where X is the level of knockback resistance you want.
	return 0;
}To use the armor material with the armor items, you'll need to create an instance of it - similar to a tool material:
public static final GuiditeArmorMaterial INSTANCE = new GuiditeArmorMaterial();You can place this instance in the armor material class itself.
Now that you've created an instance of the material, you can create the armor items in your ModItems class:
Obviously, an armor set doesn't need every type to be satisfied, you can have a set with just boots, or leggings etc. - the vanilla turtle shell helmet is a good example of an armor set with missing slots.
public static final Item GUIDITE_HELMET = register(new ArmorItem(GuiditeArmorMaterial.INSTANCE, ArmorItem.Type.HELMET, new Item.Settings()), "guidite_helmet");
public static final Item GUIDITE_BOOTS = register(new ArmorItem(GuiditeArmorMaterial.INSTANCE, ArmorItem.Type.BOOTS, new Item.Settings()), "guidite_boots");
public static final Item GUIDITE_LEGGINGS = register(new ArmorItem(GuiditeArmorMaterial.INSTANCE, ArmorItem.Type.LEGGINGS, new Item.Settings()), "guidite_leggings");
public static final Item GUIDITE_CHESTPLATE = register(new ArmorItem(GuiditeArmorMaterial.INSTANCE, ArmorItem.Type.CHESTPLATE, new Item.Settings()), "guidite_chestplate");You will also need to add the items to an item group if you want them to be accessible from the creative inventory.
As with all items, you should create translation keys for them as well.
You will need to create two sets of textures:
These textures are no different to other items - you must create the textures, and create a generic generated item model - which was covered in the Creating Your First Item guide.
For example purposes, you may use the following textures and model JSON as a reference.
INFO
You will need model JSON files for all the items, not just the helmet, it's the same principle as other item models.
{
    "parent": "item/generated",
    "textures": {
        "layer0": "fabric-docs-reference:item/guidite_helmet"
    }
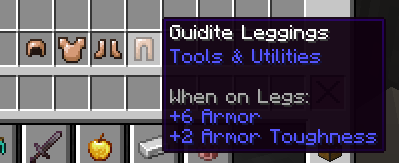
}As you can see, in-game the armor items should have suitable models:

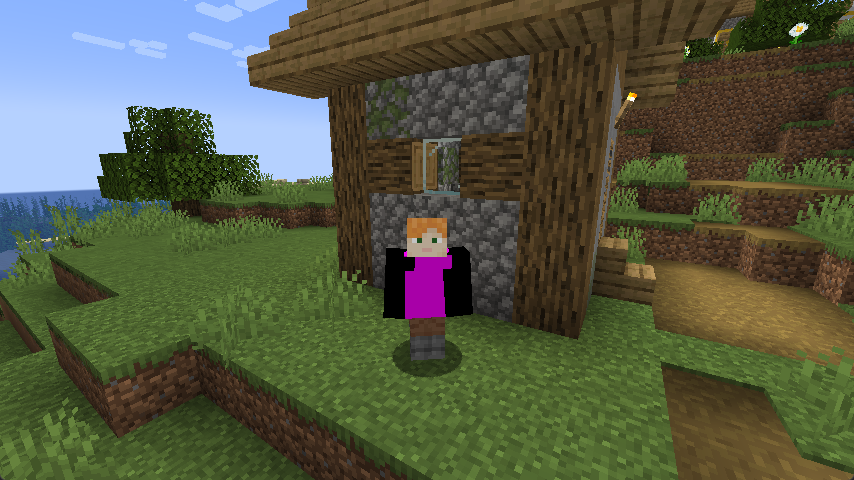
When an entity wears your armor, currently the missing texture will appear:

This is because all armor textures are hardcoded by vanilla, to create our own, we'll have to place the texture in the vanilla armor texture folder.
There are two layers for the armor texture, both must be present.
Since the armor material name in our case is guidite, the locations of the textures will be:
assets/minecraft/textures/models/armor/guidite_layer_1.pngassets/minecraft/textures/models/armor/guidite_layer_2.pngThe first layer contains textures for the helmet and chestplate, whilst the second layer contains textures for leggings and boots.
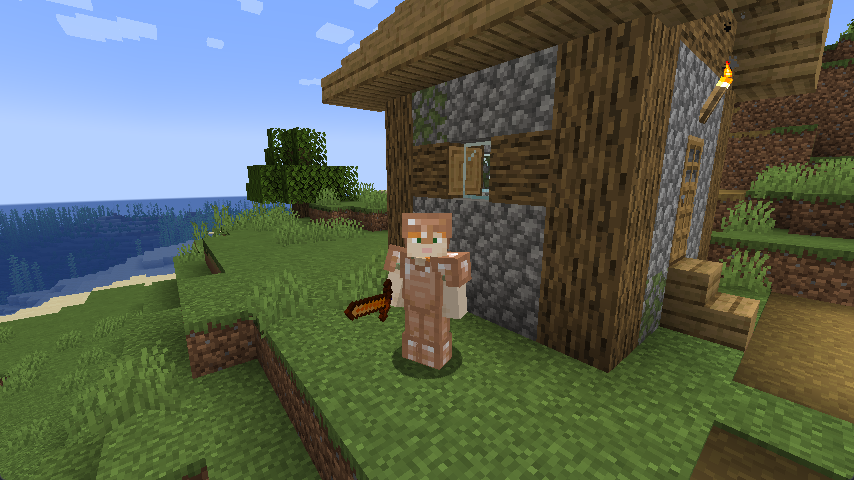
When these textures are present, you should be able to see your armor on entities that wear it:
